So you want to get your own AWS account and get started with hands on deployments. What should you do?
Getting Started
Firstly take a look at the AWS Getting Started Guide. In particular follow at least the first 3 steps of the setting up your environment. This will go through account creation, securing your root account and creating an admin account for you to use on a daily basis.
Aditional Steps
The are a few addition items I would recommend doing in addition to the steps provided by AWS.
IAM User
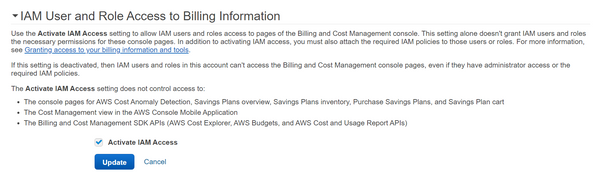
First while logged in as the root account is to enable IAM users to access billing information. This can be found in the billing console. This will mean you can modify information around billing as an IAM user or role. All you need to do is click the edit link and then tick the Active IAM access box then click update.
Security Questions
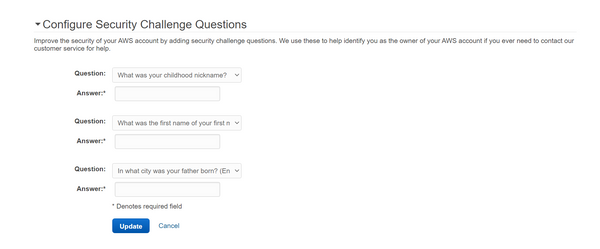
Second while still as root, on the same page as billing access, configure your security questions. This will make recovery a lot simpler if you every forget your password or phone number doesn’t work. All you need to do is click the edit link and choose the 3 questions you want to use.
Multi-Factor Authentication (MFA)
Finally you’ll want sign in as your new user and set your own MFA up. This will help to secure your normal account the same as the root.
So now you should have a secure AWS account and user credentials to log onto your account with. Start taking a look around to familiarize yourself with the console and services and in my next article we’ll look at setting up a deployment pipeline to make all your other changes.
comments powered by Disqus